Setting up a Linkedin Company profile is a little different than setting up a personal Linkedin profile. Take a look at these steps to get started:
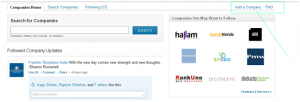
Step 1: Go to http://www.linkedin.com/companies and click on Add a Company.
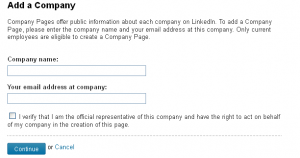
Step 2: Enter the company name and your official email id. Keep in mind that your email address should have your company name (or at least a part of it) as its domain.
Step 3: This will create a company page on LinkedIn. The individual profile owner who has created the company page should be able to see the Edit Page section on the top right of the company page. To be able to make status updates via your company page, you will have to click on Edit Page and assign designated admins for the company page.
Step 4: Also, when you click Edit Page, you will have an option of filling in details like – company size, company website, company description, company location and other details. A word of caution out here is if you do not designate admins for your company page, anyone who is an employee of the company ( LinkedIn recognizes this by their official email address ) can edit the information on your page. Hence it is recommended to have designated admins for your company page.
Step 5: Next, head to the Products & Services tab on the top, just below the company page name, right next to the Home tab. There’s an edit option there as well. The admin can add the company’s services/products on this tab.
Step 6: Finally, the Careers tab located to the left of the products and services tab allows you to post a job as a page admin and showcase your company culture.
These helpful steps can be found at www.SocialMediaToday.com


